Brakes for the Toyota Supra MA-70
 |
Here an image of the original sales leaflet by Toyota (Germany). You can see the brake disk, the five connection bolts and the brake caliper. |
Braking system (not the parking brake)
The braking system of the Toyota Supra consists of a hydraulically operated front and rear disc brake systems. The Toyota Supra has had disc brakes since the introduction of the first one (2000 GT). Some normal cars don’t have disc brakes, but drum brakes. Disc brakes are normally for high performance cars, or racing cars. Exactly, just like the Toyota Supra. There are some cars available having disc brakes only at the front wheels, the rear brakes are equipped with drum brakes, for example my neighbor’s car a BMW 3 series. Note that most braking power is applied to the front wheels, normally around 60% to 70%, depending on car and engine specs.
The whole braking system of the Toyota Supra MK3 is managed by an A.B.S. computer. This computer constantly checks if the wheels still spin, when you hit the brakes. When the wheels don’t spin anymore, the A.B.S. actuator will release some pressure from the brakes, so the wheels get a chance to spin again. Now you all people want to know why this is, right? Well, when wheels don’t spin, you cannot use them to steer. And the last thing you want when braking, is that you can not avoid any obstacles nearby or coming closer.
To monitor the speed your wheels are turning around with, both the front wheels are equipped with a speed sensor. The rear wheels share one sensor, which is located just after the transmission which goes into the differential.
Maintenance
The only maintenance I’m familiar with at the moment is replacing the brake pads. These pads look like this:
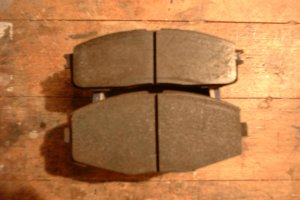 |
The brake pad you see on the top is the rear brake pad. This on has the dimensions of: w = 125.5 mm, h = 42.0 mm, t = 15.5 mm The brake pad down, is the front brake pad. This one is bigger, because the braking force applied on the front wheels is bigger. The dimensions for this pad are: w = 125.5 mm, h = 56.0 mm, t = 15.0 mm |
You can easily replace your brake pads, with new stock ones. This is an easy job to do yourself. The first wheel will take you about two hours, and every next wheel you’ll do will take less than 15 minutes. The part numbers for the braking pads are (in my country The Netherlands. Please supply me with part numbers in your country when they are different):
0446614030 – Set braking pads (4) for front
0446614110 – Set braking pads (4) for rear
Replacing the brake pads
This is the procedure for replacing the brake pads.
- Securely park and block your car.
- Loosen the bolts for the wheel to be removed a little
- Lift the car using a jack.
- Secure the car with wooden blocks or something else, so IF the jack fails / falls / collapses the car won’t fall on your foot or something.
- Remove the five bolts you just have loosen and remove the wheel
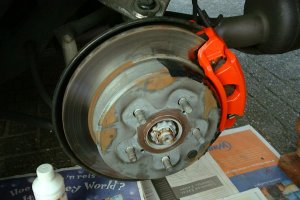 |
This is how the car will look when you remove the wheel 😉 Except for the black plastic I used while painting my calipers.
|
- Now remove the bolt that’s on the inside of the car, the one nearest to the ground.
- You can now ‘open’ the caliper
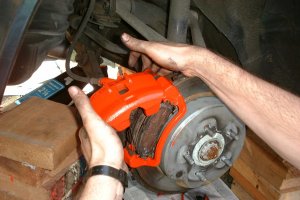 |
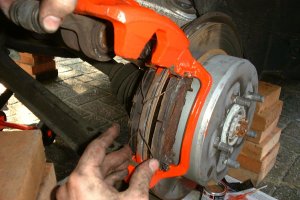
This is the caliper while being opened. Yes people you are right, this is the wheel on the other side. That’s because you have to replace the pads on both rear wheels or both front wheels. Never replace only left or right side.
|
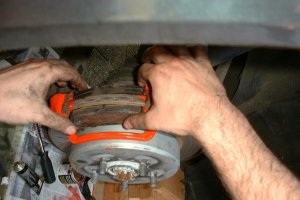
- Now remove the caliper and gently lay it on something high enough. For example some wooden blocks like in the picture. Don’t bother removing the brake fluid line. This is not an option! Takes you a hell of a time to fill up the whole brake line system with new fluid.
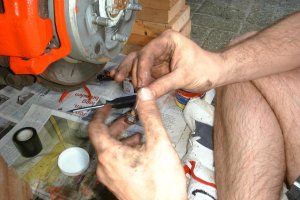
- Now gently remove the metal springs from the brake pads. These springs are there to ‘unbrake’ when you remove your foot from the brake pedal.
- Pull out the brake bads and check if they are really that worn as you think
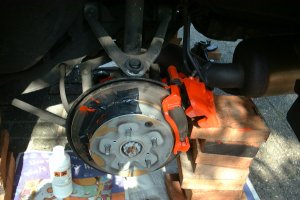 |
The car should now look something like this, except for the red paint and the black tape ofcourse 😉
|
- Take your new pads and put some copper grease on the back of the pads. This is for preventing the brakes from making bad noises. Do not put grease on the brake part (front) of the pad. If you do so, maybe by accident, remove it all. Fast braking and copper grease do not match!!!! It’s very dangerous.
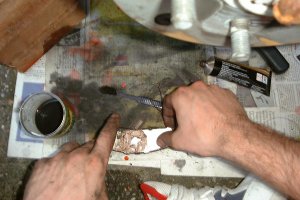 |
Grease the pads a little up on the backside, to avoid annoying sounds while braking.
|
|
|
Put the new pads back into the caliper. Make sure you don’t put copper grease on the disks or pads. |
 |
Don’t forget to put the springs back in! I did forget it on one wheel, and you have to re-open the caliper. That sucks. |
- Close the caliper and put the bolt on the backside back in.
 |
It’s not a bad idea to grease the bolt up a little. In that way it can be
|
- Now it’s a good time to check your tires if they are still in
the optimal state. Check for things that should not be there. right rear
tire had a big screw in, I discovered while painting my calipers.
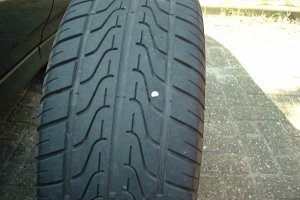 |
This can be in your tire, if you are unlucky
|
Aftermarket / Performance
If you don’t want to go for stock braking pads, but you want better braking performance, there are a lot of other braking pads you can choose from. I know people who have successfully applied these brands to their MK3 Toyota Supra:
Porterfield Racing Brakes – This company based in Costa Mesa California, can provide you with Carbon Kevlar racing pads. Three different types of racing pads are available, the ‘R4’, the ‘R4-S’ and the ‘R4-E’. The R4 is for racing applications, the pads need to be warmed up as well, before they can really operate at full performance. The ‘S’ in ‘R4-S’ stands for ‘street’. These pads are the most common ones used by many Supra owners. The ‘R4-E’ is the so called ‘Endurance’ pad. This pad is the best choice when you do a lot of racing for very long times. Hence the size of the fuel tank, not an option 😉 Bear in mind Carbon Kevlar brakes don’t leave that much dirt on your rims, which is a very good plus I would say. My rims always are dirty as hell. The order number for the pads from Porterfield are: AP336 for front and AP337 for rear. Tell them you need the R4-S type, as the R4 and R4-E have the same order number. The front brakes are $89,- and the rear brakes are $79,-
Axxis Metal Master Pads – This company, formerly known as ‘Lucas Metal Max’ or ‘Repco Metal Master pads’ is from Australia. Currently I don’t have enough information about these pads, nor do I have a website of this company. If people can supply me with, please do so.